To purchase click the white cart icon in the upper right corner.
Description

Mounting a Matched Transistor Pair and Tempco
When mounting the matched transistor pair and tempco it is important that they are in thermal contact with each other and that they stay at the same temperature during use. Here is my method for mounting a matched pair and tempco.If you are fortunate enough to have found the SSM2210 in DIP form then just insert it as the chip outline indicates and mount the tempco on it's back with heat sink grease. Typically there are holes for the tempco that straddle the chip or transistor mounting area so that adding the tempco in thermal contact with the transistors is convenient.
In some projects the use of a tempco is optional and so there is usually a legend on the PCB for the original non-tempco 2K control voltage summer feedback resistor. If there is an alternate component legend for the control voltage summer feedback resistor DO NOT INSTALL IT. If you do you will have the equivalent of two parallel 2K resistors as the control voltage summer feedback resistor and your oscillator will respond in a 1V per half-octave kind of way. Taking a good look at the schematic and the PCB is the best way to find out if this is the case.
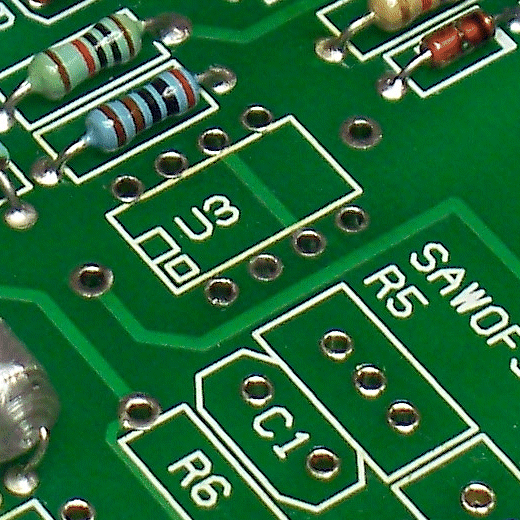
Step 1 - Identify Pins
In this example we are mounting the matched pair and tempco on the MFOS VCO PCB. The principles apply regardless of the project. Make sure you know which pin relates to which when mounting the transistors. Always consult the schematic and PC layout to be sure which way to mount the transistors.
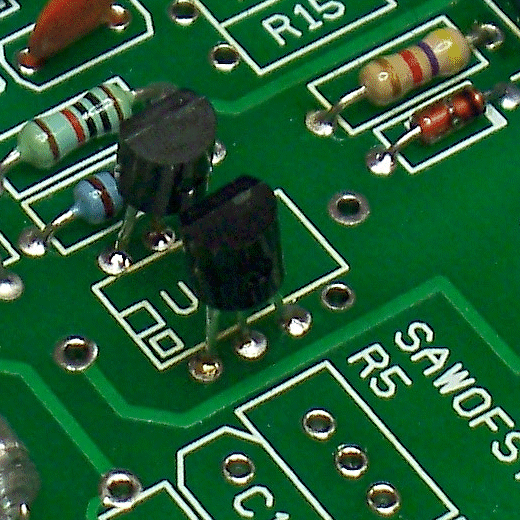
Step 2 - Install Transistors
Solder the transistors into the board in the correct orientation (consult the schematic and PC layout). Don't linger with your solder iron when soldering the matched transistor pair. You don't want excessive heat to change the characteristics of either transistor in the matched pair. Here we see two 2N3904 NPNs that were hand matched being used.
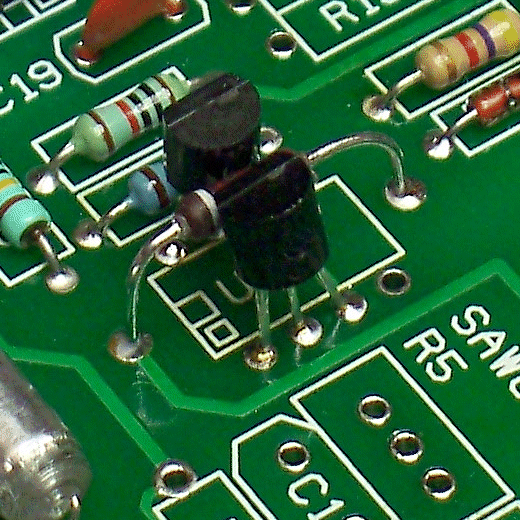
Step 3 - Install Tempco
Next install the tempco so that it will be in physical contact with both of the matched transistors. You might prefer to put the transistors in contact and then mount the tempco on top of the pair instead of in-between as I have, either way will work. Don't linger with your solder iron when soldering the tempco. You don't want excessive heat to change its characteristics.
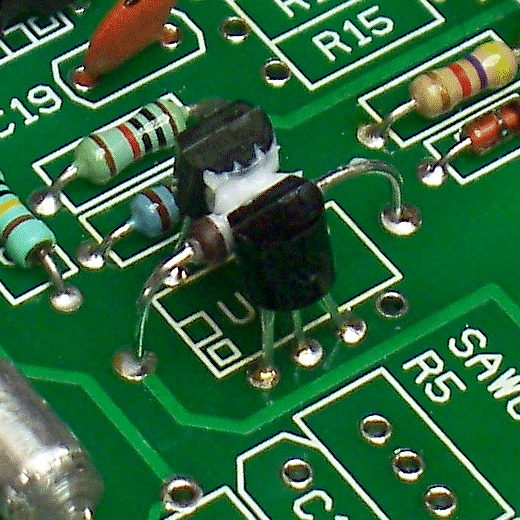
Step 4 - Apply Heat Transfer Compound
Put some silicon heat sink compound between the components to facilitate heat transfer between them. Try not to get it all over the place and especially not on the leads. As inert as the stuff is I don't take chances since it will be in contact with whatever it touches for, hopefully, a long time. I use this stuff that I buy from Radio Shack.
 |
 |
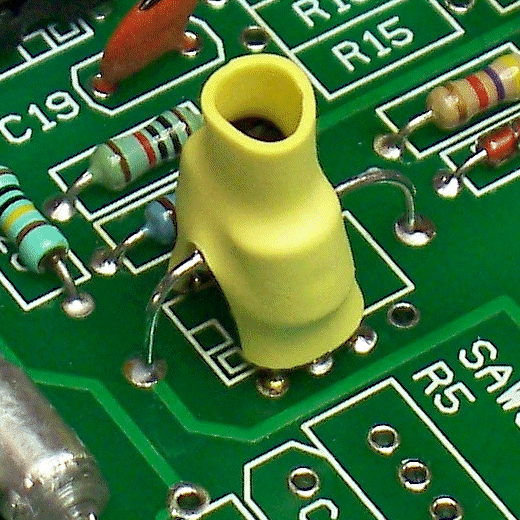
Step 4 - Install Heat Shrink Breeze Shield
Lastly I put a heat shrink breeze shield over the parts to help keep them in physical contact and at the same temperature. Take it easy with the heat gun and use the low range (if available). Again too much heat has the potential to change the characteristics of the transistors so carefully shrink the tube and stop when the material conforms to the shape of the transistors and tempco. I split the tube a bit to accomodate the leads of the tempco but using tube large enough to encompass the tempco leads would be preferable.
That is pretty much that. I Hope this helps you get your matched transistors and tempcos mounted correctly. Namaste.